Creating a Managed Application in Azure
- 26 Apr 2023
- 4 Minutes to read
- Print
- DarkLight
- PDF
Creating a Managed Application in Azure
- Updated on 26 Apr 2023
- 4 Minutes to read
- Print
- DarkLight
- PDF
Article Summary
Share feedback
Thanks for sharing your feedback!
Prerequisites
You must have the sufficient permissions to register an application with your Azure AD Tenant, and to assign the application a role to your subscription. To check if you are eligible to create an application registration, navigate to Azure Active Directory > Users > User settings. Check the app registration settings. If set to "Yes", any user in the Tenant can create an app. If set to no, only an administrator role can create an application. Please contact an admin role to either provide you access or create the app. For more information, visit: Check Azure AD Permissions
There are two main ways to create an Azure application, you may use:
- Azure Portal
- Azure CLI (Command line)
- If you do not or are unsure if you have the CLI installed, please visit: Installing the AzCopy & Azure CLI
Creating the Application
In this section you will learn how to create a managed application using both the Azure Portal and Azure CLI commands.
Using the Azure Portal
1. Log in to the Azure Portal
2. If you have access to multiple tenants, click on the top right account menu and click switch tenant and choose the tenant in which your target storage container resides.
3. In the Search bar type Azure Active Directory
4. Under Manage, select App registrations and then new registration
5. As shown in the dialog below: enter the name of the app, select "Accounts in any organizational directory (Any Azure AD directory - Multitenant)" and click Register. There is no need for a redirect URI.

5. The application can be found under "App registrations" in Azure Active Directory. Click on it and copy down Application ID. You will use it to configure access to the data in Bobsled as outlined in this article: Azure Blob Storage Destination.
.png)
6. Under Manage navigate to Certificates & Secrets to create a client secret:
6a. Select "New client secret". As shown in the image below, a pop up to the left will appear.
6b. Add a description for the secret. This can be anything you want. For example "password".
6c. Set the expiration date of the client secret. Azure recommends 6 months however you may have this secret last up to 2 years. Once the selected expiry date passes, you will need to create a new one.
6d. Click "Add" to create the client secret.

7. Copy the client secret's "value". Make sure to store the secret in a safe place of your choice, for example in Azure Key Vault.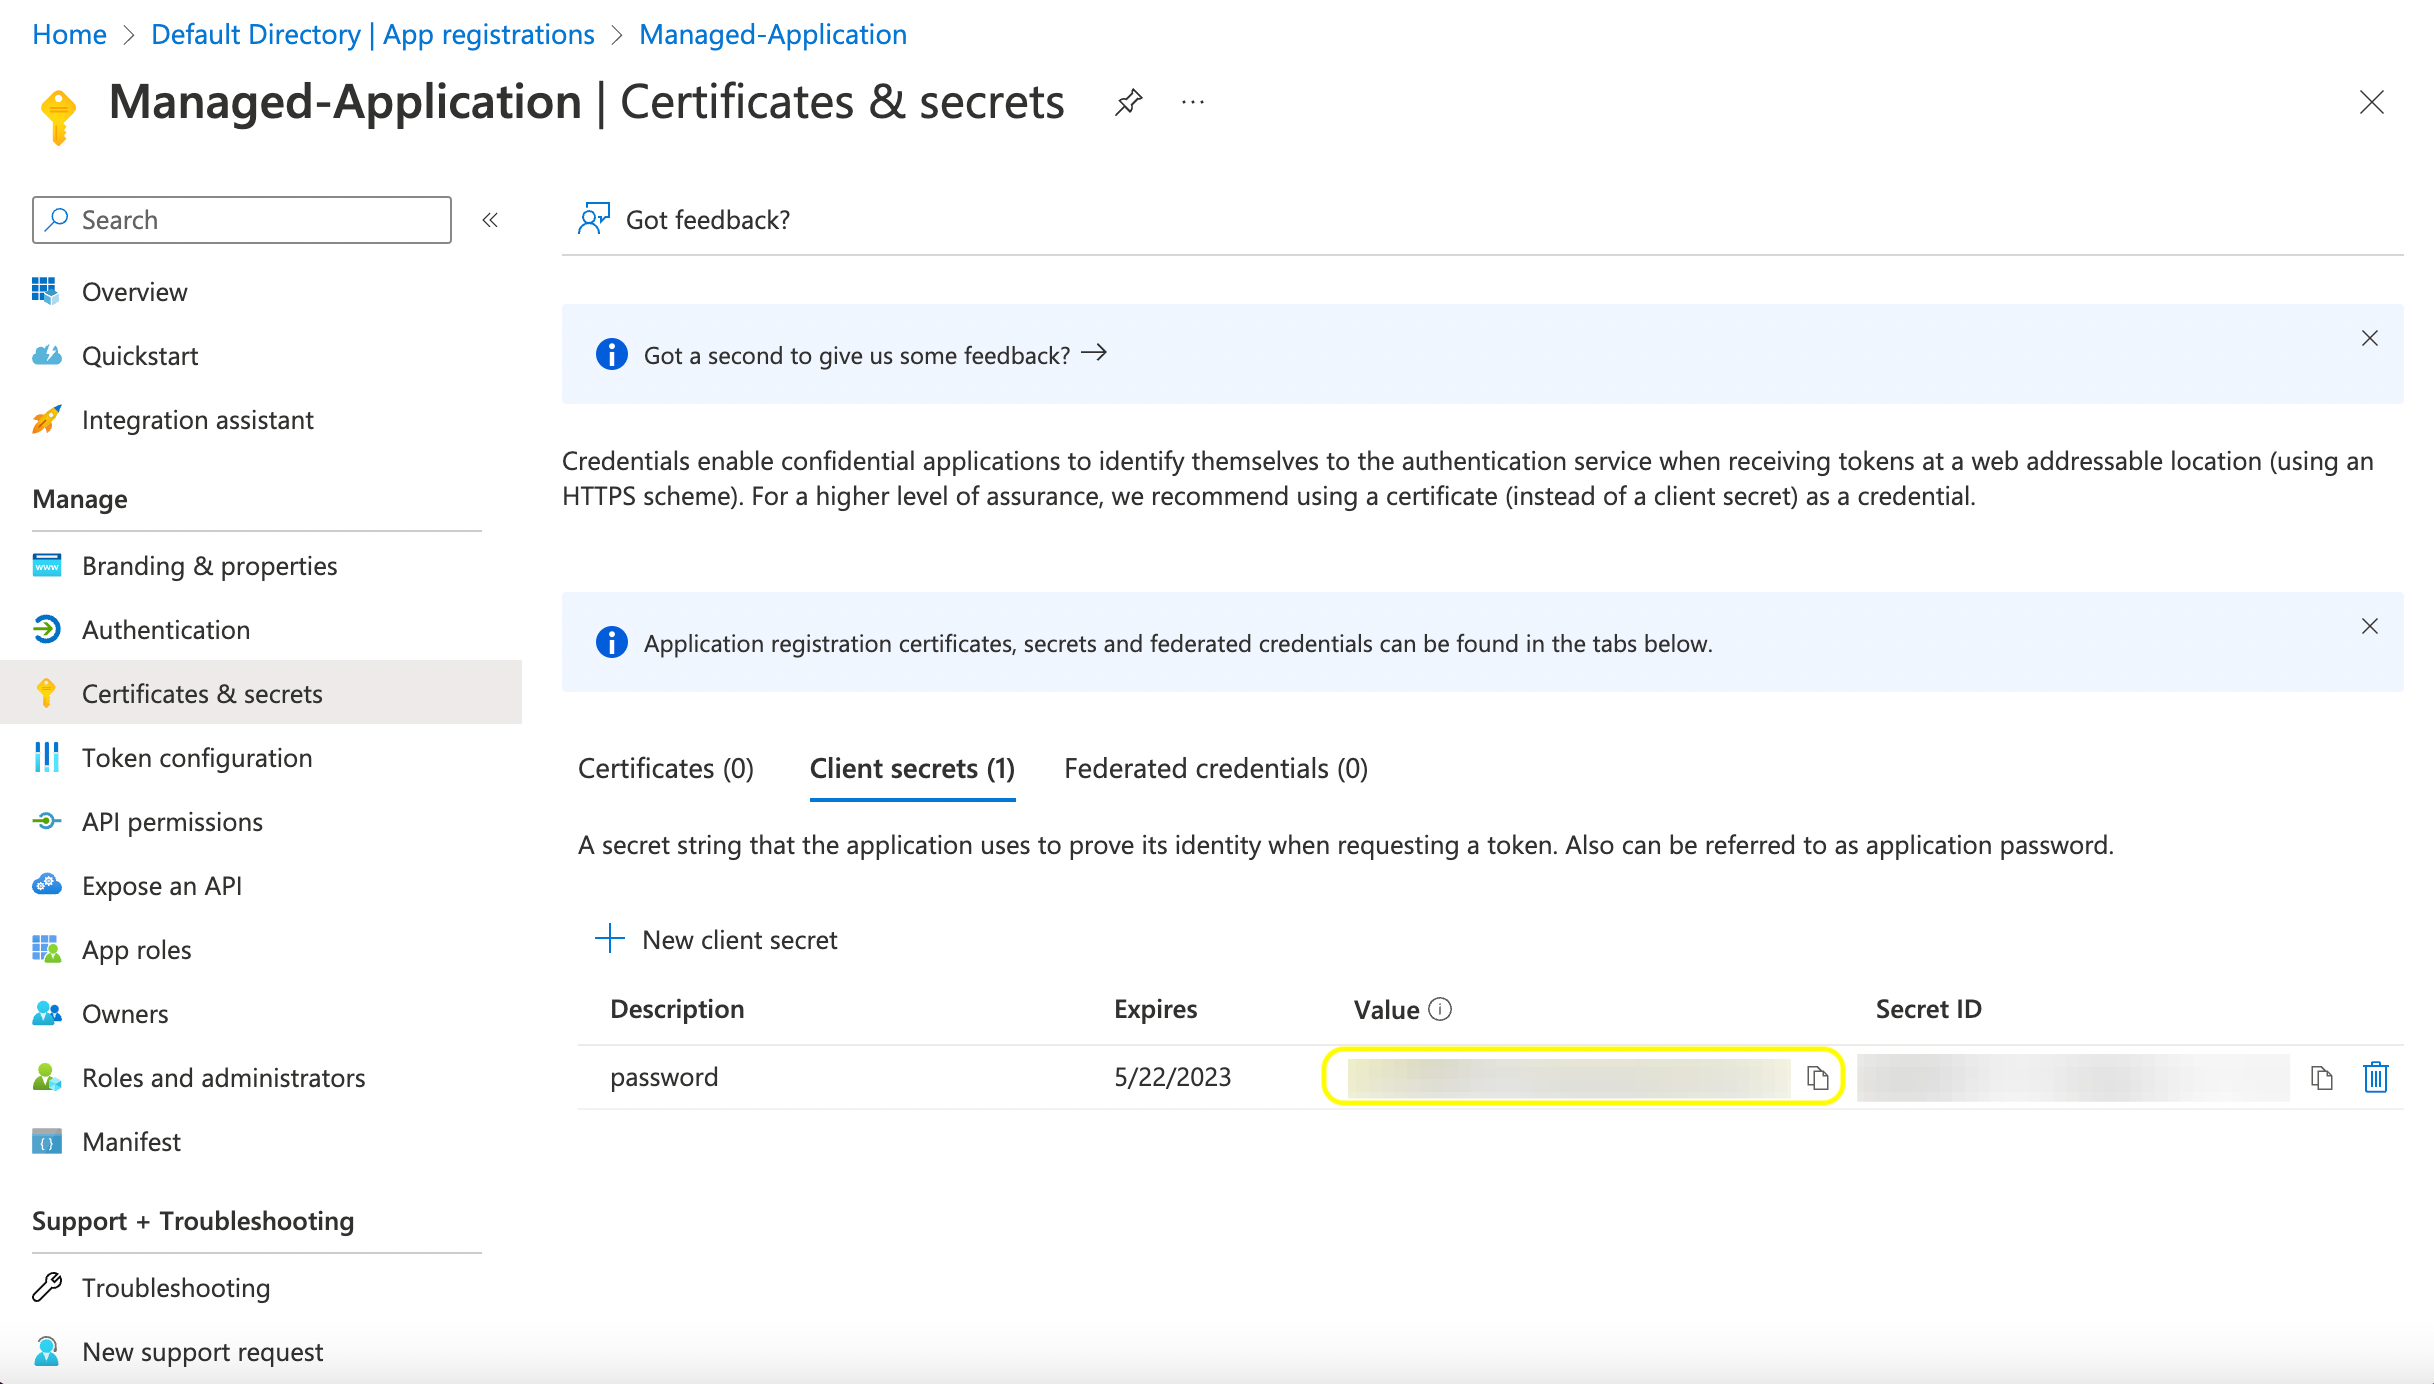
8. Assign the app permissions to your subscription. The subscription you use should be associated with your desired storage account and target destination container.
8a. In the Portal search bar, type in "Subscriptions"
8b. Select the name of your subscription and click Access control
8c. Click the "+ Add" button in the upper left hand corner of the screen. Select "Add role assignment".
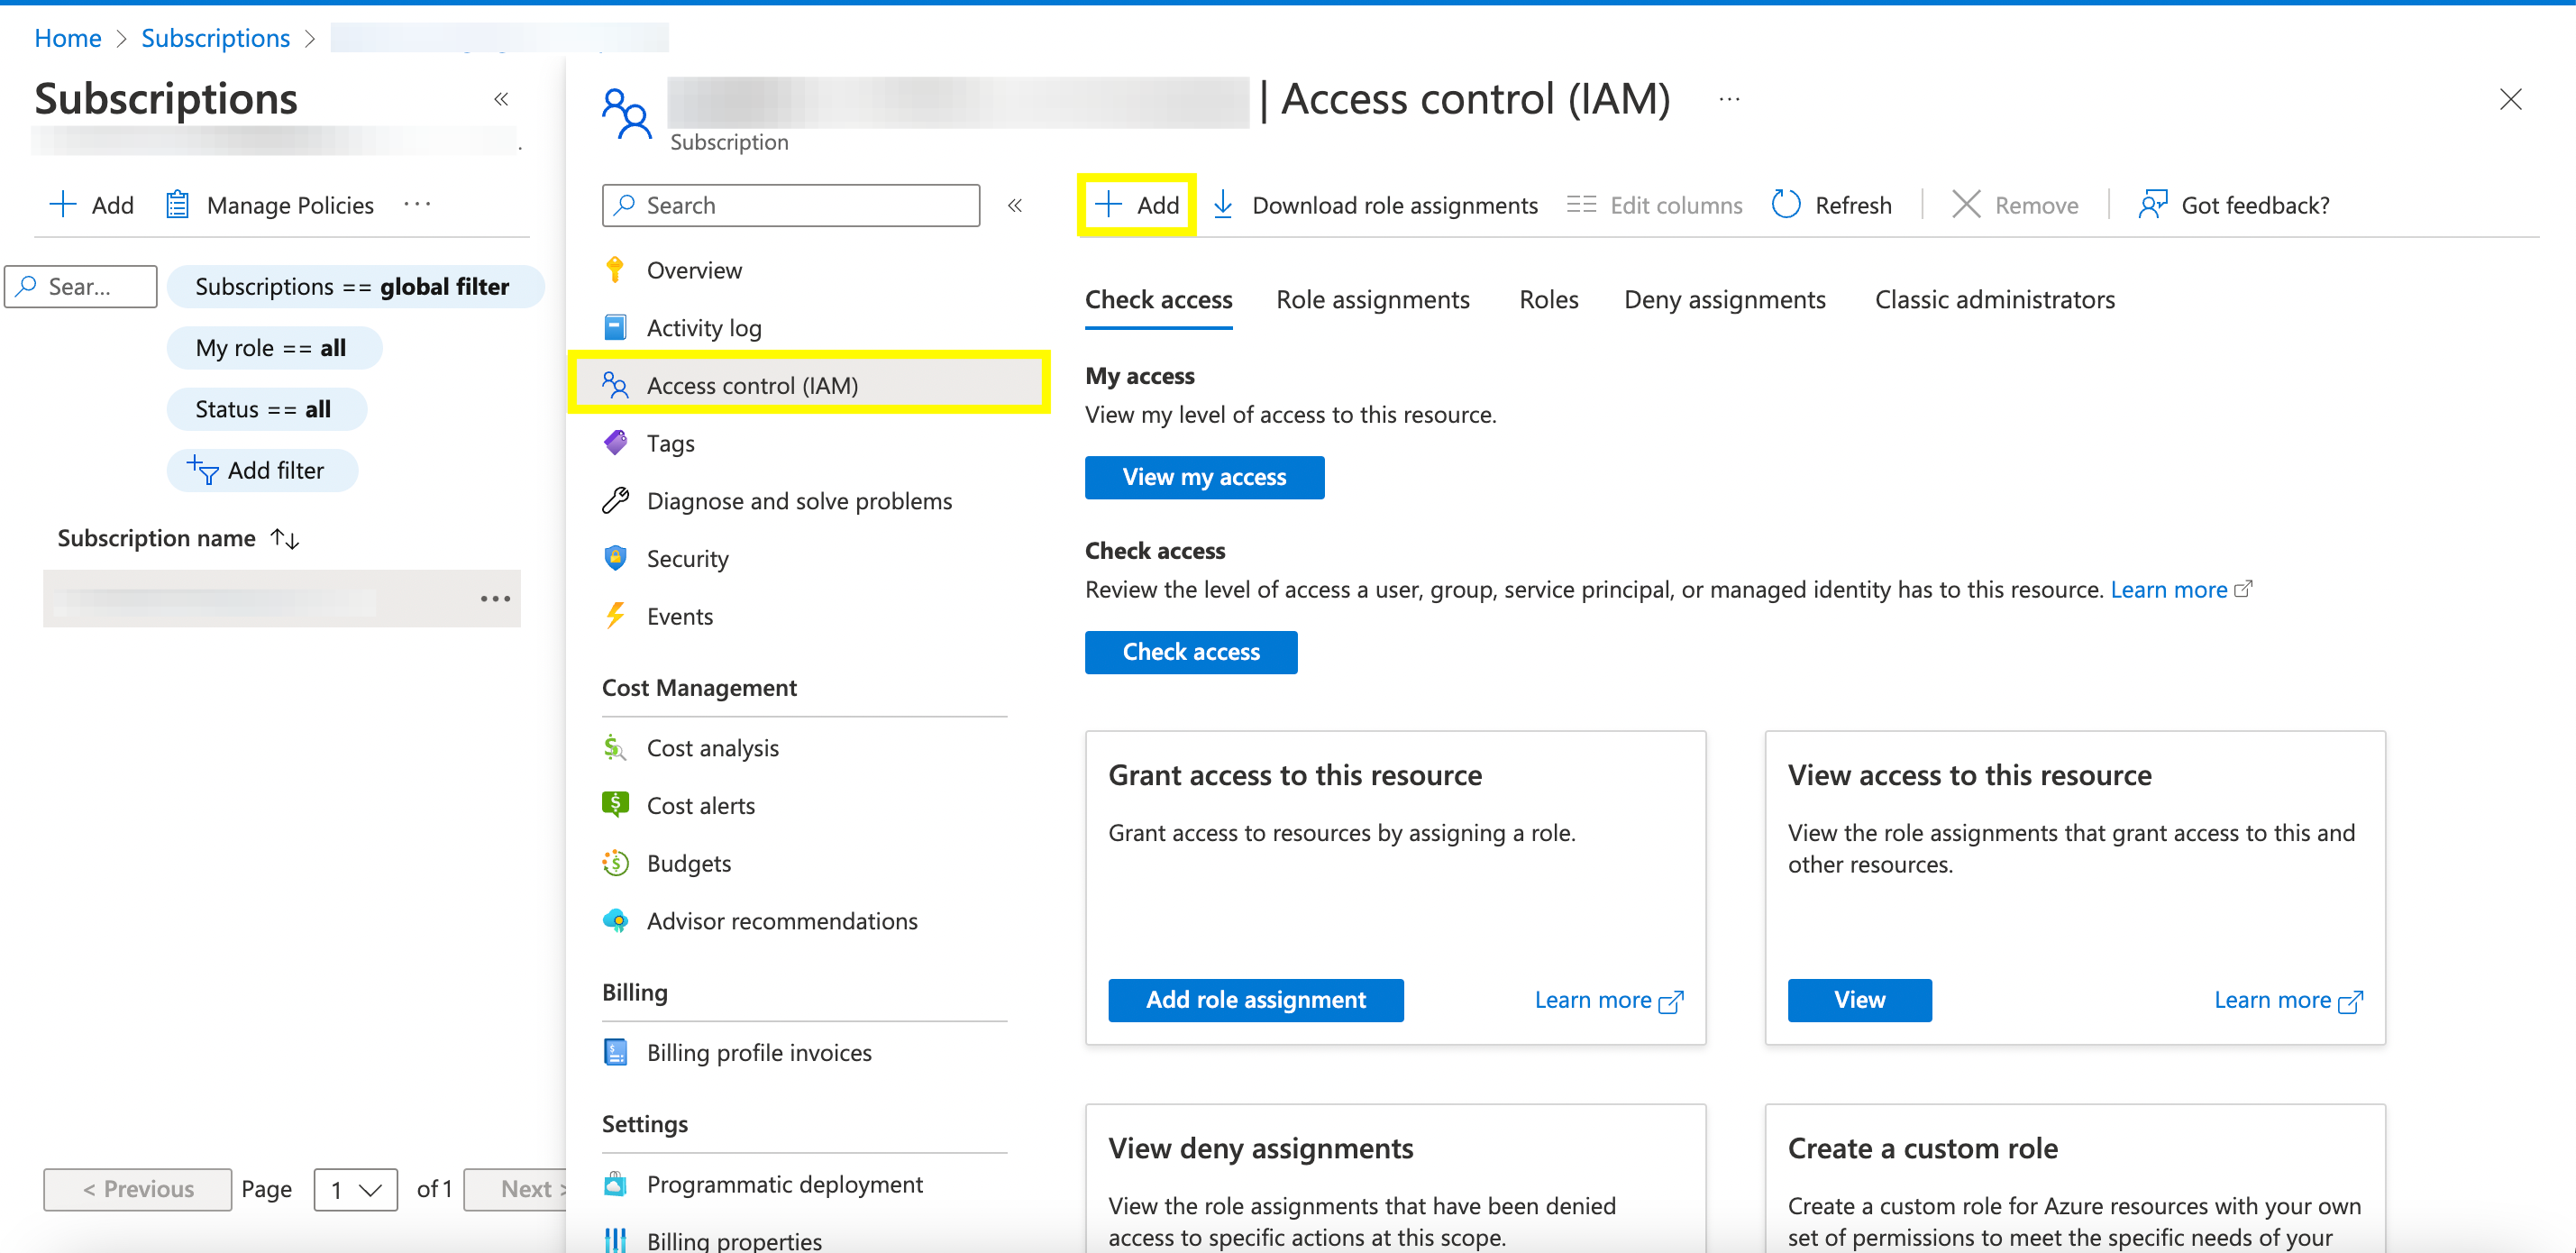
8d. Follow the role assignment dialog. Search for the role Storage Queue Data Reader and assign it to your application.
9. Assign the app permissions to your target destination container.
9a.In the Portal search bar, type in "Storage Accounts"
9b. Select the name of your Storage Account. Click Containers and select your target container name. You may also choose create a new one.
9c. Click on Access control and select the "+ Add" button in the top left hand corner. Select "Add role assignment".
9d. Search for the role Storage Blob Data Contributor and assign it to your application.
Using Azure CLI
To create a multi-tenant application on the CLI, you will need to have the Azure CLI installed or use Azure CloudShell to run the following commands.
1. Log into the Azure CLI with the Tenant ID in which your target storage container resides by running the following command:
Need help finding your Tenant ID? Visit: https://learn.microsoft.com/en-us/azure/active-directory/fundamentals/active-directory-how-to-find-tenant
az login --tenant <tenantID>1a. In the output of the command, copy the value of the "id" field. This is the id of your subscription that you will use in Step 2.
.png)
2. Create the application with the role "Storage Queue Data Reader" scoped to your subscription:
az ad sp create-for-rbac -n <app name> --role "Storage Queue Data Reader" --scope "/subscriptions/"- <app name>: The name of your application
- <subscriptionID> : The id of your subscription (copied in Step 1).
- Storage Queue Data Reader role:Read and list Azure Storage queues and queue messages
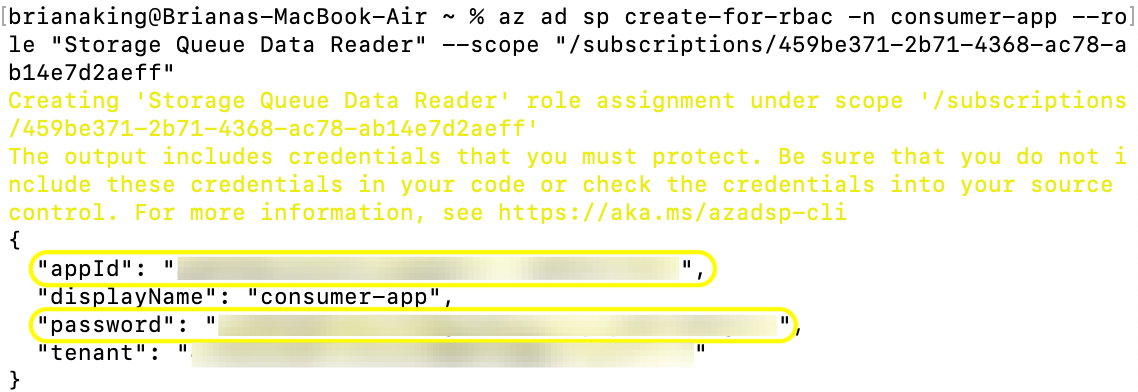
2a. Copy down "appID" and "password" values. You will use the appID to configure access to the data in Bobsled as outlined in this article: Configure an Azure Blob Storage Destination. Make sure to store the secret in a safe place of your choice, for example in Azure Key Vault.
3. Make the app Multi-Tenant
az ad app update --id <App ID> --sign-in-audience AzureADMultipleOrgs3a. There is no output from this command
4. Assign permissions to your target container
If you would like to create a new container run the following command:
az storage container create -n <container name> --account-name <storage account name> --auth-mode loginThe output should display: "created: true"
4a. Assign Storage Blob Data Contributor role to your target container.
az role assignment create --assignee <appID> --role "Storage Blob Data Contributor" --scope "/subscriptions//resourceGroups//providers/Microsoft.Storage/storageAccounts//blobServices/default/containers/"What you will need:
- <app name>: The name of your application
- <subscriptionID>: The id of your subscription (copied in Step 1).
- <resource group name>: The name of resource group that the storage account resides in
- <storage account name>: The name of the storage account that the container resides in
- <container name>: The name of the container
- Storage Blob Data Contributor role: Read, write, and delete Azure Storage containers and blobsIf you do not know the resource group name, run the following command:
az storage account show --name <storage account name>1. Copy down the "id" field and append '/blobServices/default/containers/<container name>' to the end of it to create the scope.
Was this article helpful?